
Mischief managed? Not quite! When a friend asked me to create a Harry Potter-inspired version of my Pull-Top Christmas Gift Card Holders, I knew this project needed to be next-level magical! With iconic house colors, spellbinding embellishments, and a fun interactive pull-tab mechanism, these handmade stocking-shaped holders take holiday gift-giving from muggle to magical in an instant!
Whether you’re crafting for a fellow wizard, a Hogwarts-loving friend, or a Potterhead in training, this project is the perfect way to give a gift card with style, charm, and a touch of wizardry!
So, grab your wands (or craft supplies), and let’s make some magic! Expecto Patronum—er, Expecto Crafto! ✂️✨
Materials – A Magical Mix of Cardstock & Embellishments! 🎨✨
(No polyjuice potion required—just some fantastic supplies!)
STAMPS & DIES:
✔Stampin’ Up! Poinsettia Petals Thin Cuts
✔Stampin’ Up! Deckled Circle Dies
✔Stampin’ Up! Greetings Of The Season Stamp Set (for the “To & From” stamp)
INKS & MARKERS


✔Stampin’ Up! Classic Stampin’ Pads – Cherry Cobbler, Garden Green
✔CTMH White Daisy Ink Pad or Stampin' Up! White Craft Refill
✔CTMH Intense Black Ink
✔Stampin’ Blends - Dark Mossy Meadow – for leaf detail
CARDSTOCK


✔Cherry Cobbler Cardstock (or CTMH Scarlett) – for stocking cutouts, poinsettia, and cuffs
✔Pumpkin Pie Cardstock (or CTMH Sundance) – for stocking stripes and stars
✔Basic White, White Willow, or White Daisy Cardstock – for circle embellishment, sock detail, middle cuff, pull tab
✔Garden Green Cardstock – for the leaves
✔Basic Black Cardstock – for stocking cutout, cuffs, sock detail, and poinsettia
EMBELLISHMENTS
✔Cherry Cobbler and Clear Adhesive-Backed Berries – for poinsettia centers and around the embellishments
✔Cherry Cobbler & Gold 1/4 Satin Ribbon – for the stocking loop
TOOLS
✔White Gel Pen – for hand-drawn stitching
✔Foam Tape, Sponge Daubers, Paper Trimmer, Adhesives, Bearly Glue – for assembly
Designing the Harry Potter Pull-Top Christmas Gift Card Holders in Design Space®️ 💻✨

Using Design Space®️, I was able to visualize, size, and tweak my design before cutting. One of my favorite things about using Cricut is that I can store my past projects—so modifying my previous Disney-inspired stockings was a total breeze!
🧙♂️ No Cricut? No problem! I often use Design Space®️ for planning, then rely on dies, stamps, and good old-fashioned paper-cutting skills to bring my ideas to life. Whether you print & cut, hand-cut or use dies, this project is totally adaptable!
Creating the Iconic Striped Paper – DIY Gryffindor Magic!
Nothing says “Hogwarts house pride” like a bold, striped pattern! But instead of searching for pre-made paper, I created my own custom design for the stocking base.
How to Make the Striped Stocking Paper:

1️⃣ Cut a 6” x 11 1/2” piece of Cherry Cobbler cardstock.
2️⃣ Cut six strips of Pumpkin Pie cardstock (6” x 1/2” each).
3️⃣ Adhere the strips evenly across the Cherry Cobbler cardstock to create the classic Gryffindor scarf look!
💡 Pro Tip: This technique works great for any house color combo! Swap out Pumpkin Pie for Daffodil Delight (Hufflepuff), Night of Navy for Ravenclaw, or Garden Green for Slytherin and craft for your favorite Hogwarts house!
Prep To Make Both Cards:
Cut out all stocking front and back pieces:
•. 1 piece in the striped Cherry Cobbler paper we created
•. 3 pieces in Basic Black Cardstock
Cut out all cuff pieces:
•. 1 in the striped paper we created
•. 1 in Basic Black Cardstock
•. 2 in Cherry Cobbler (or CTMH Scarlett)
•. 2 in White Willow (or CTMH White Daisy)
Cut two strips of White Willow: (for the pull tab)
•. 1 measuring 2 1/4” x 5 1/3”
•. 2 smaller strips measuring 2 1/4” x 1”.
Using Stampin’ Up! Deckled Circle Dies:
•. Cut two pieces with the 2 3/4” x 2 3/4” die in White Willow and Cherry Cobbler.
•. Ink the edges of the White Willow Deckled Circle using a sponge dauber and CTMH Intense Black Ink.
• Using the 2 1/2” x 2 1/2” Deckled Circle Die:
• Cut pieces in Basic Black, Cherry Cobbler (2), and the striped paper we created.
Using Stampin’ Up! Poinsettia Petals Dies:
•. Cut 12 leaves in Garden Green Cardstock.
•. Ink the edges of each Garden Green leaf with a Garden Green Stampin’ Pad using a sponge dauber, then use Dark Mossy Meadow Stampin’ Blends to accentuate the leaf veins.
•. Cut two poinsettias in Cherry Cobbler and two in Basic Black.
• Ink the edges of each Cherry Cobbler petal with the Cherry Cobbler Stampin’ Ink Pad and adhere the petals together with a small amount of Bearly Glue in the centers. Set aside to dry.
Cherry Cobbler & Gold ribbon:
•. Cut 2 pieces of Cherry Cobbler & Gold ribbon to 3” each.
•. Print and cut your SVG title and embellishments.
1. Assembling the Striped Stocking:

•. Start by gluing the striped front of the first stocking to the Basic Black back. To do this, apply a thin line of glue as close to the two sides and bottom edges of the stocking as possible. Remember not to glue along the top edges of the stocking, as this will serve as your pocket for the gift card. Set aside to dry.
General Construction of the Stocking & Pull-Tab Mechanism 🏰
Now that our materials are prepped, it’s time to assemble the stocking base!
Rather than repeating every step of the stocking construction, check out my full tutorial on "Basic Construction - Pull-Top Stocking Gift Card Holder".
🔮 Follow those instructions to:
✔ Construct the stocking base
✔ Create the interactive pull-tab mechanism
✔ Attach the stocking cuffs & toe details
Once you’ve assembled your stocking, hop back here for the fun part—adding the magic!
Adding the Wizarding Touches – Time to Decorate! 🪄✨
Now that the structural work is done, let’s bring this stocking to life with a spellbinding mix of embellishments, layering, and finishing details!
1️⃣ Add Hand-Drawn Stitches
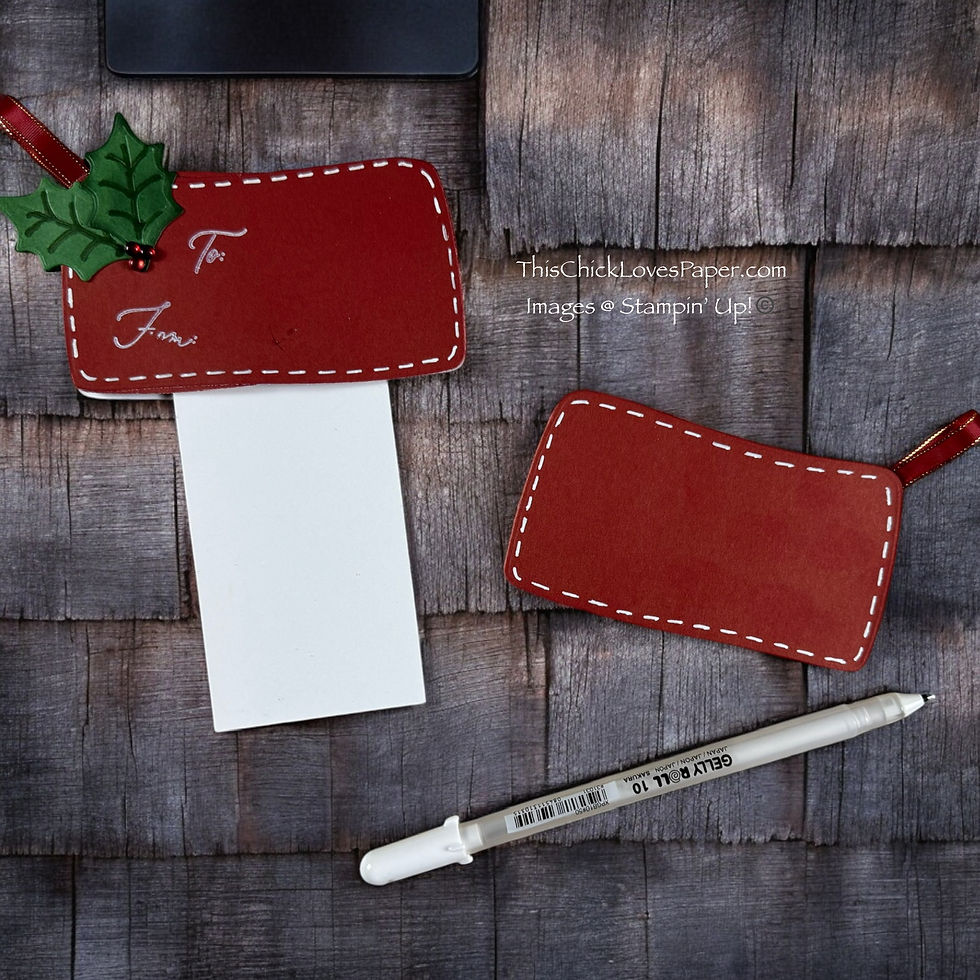
Using a white gel pen, add hand-stitched details to the stocking toe, heel, and cuff on the front and back of the stocking. This gives it a cozy, handmade feel—just like a Weasley Christmas sweater!
Adding Embellishments: The
Back Side of the Stocking

✔️ Position and attach your poinsettia leaves on the stocking cuff, ensuring that one leaf sits on each side of the stocking loop, as shown in the photo above. Once in place, add a Cherry Cobbler & Clear Adhesive-Backed Berry where the two leaves meet to create a polished, festive cluster.
✔️ Stamp the words “To” and “From” onto the stocking cuff using CTMH White Daisy Ink or Stampin’ Up! White Craft Refill with the Stampin’ Up! Greetings of the Seasons Stamp Set. Be sure to let the ink fully dry before handling to prevent smudging.
✔️ Attach your Dobby embellishment to the center of the 2 3/4” x 2 3/4” Cherry Cobbler Deckled Circle Die. Position the book embellishment so that its corner slightly overlaps the sock in Dobby’s hands, creating a seamless, storybook-inspired design.
✔️ Finish off the back embellishments by adding multiple-sized stars cut from Stampin’ Up! Pumpkin Pie (or CTMH Sundance) cardstock. Scatter them around the design for a whimsical, magical touch that ties the entire look together! ✨
Adding Embellishments to the Front of Stocking
Now that the back is complete, it’s time to embellish the front of your Harry Potter Pull Top Gift Card Holder. These detailed steps will ensure that the front matches the magical theme while adding layers and dimensions that make it truly special.

✔️ Position the Stampin’ Up! Cherry Cobbler poinsettia (or CTMH Scarlett) on the side of the cuff, placing the Garden Green leaf cluster beneath it. Allow the leaves to extend slightly over the stocking for a natural, flowing effect. For a seamless design, align these leaves with those on the back cuff to create a cohesive look from every angle. Once properly positioned, adhere the leaves together to secure the arrangement. 🌿✨
✔️ Add the Poinsettia and Leaf Cluster
Position the Harry Potter title on the left-hand side of the cuff, with the stars and wand, ensuring it stands out as a bold focal point. This instantly recognizable element brings the magical essence of the Wizarding World to life, making the design unmistakably Harry Potter-inspired! ⚡✨
✔️ Add the Center Embellishment Cluster
Start by positioning the White Deckled Circle Die in the center of your stocking design. Tuck the Garden Green poinsettia leaves slightly under the left side of the circle, allowing them to peek out just enough to add dimension and a festive touch.
Next, place your SVG embellishment directly on top of the White Deckled Circle Die. To create a stunning 3D effect, apply foam tape to the back of the SVG before adhering to it. This will lift the design, adding depth and making your magical embellishment stand out beautifully! ✨🪄

✔️ Assembling the Second Stocking
Now that we’ve completed the striped stocking, it’s time to put together the second variation! The construction follows the exact same steps, with one key difference—how the striped paper is used.
• In the first design, the striped pattern was used for the main stocking body, while the cuff, toe, and heel were solid colors.
• In this version, we flipped the design— the main body is solid black, and the striped pattern is featured on the cuff, toe, and heel.

Explore More Gift Card Holder Ideas! 🎁✨
Looking for more enchanting gift card holder projects? Check out these spellbinding ideas:


Share Your Creations – Let’s See Your Wizardry!
Did you create a Harry Potter-inspired stocking gift card holder? I’d LOVE to see it! 🧙♂️✨
📸 Snap a pic and share it in our Members’ Gallery!
🏰 Tag me so I can cheer on your magical masterpiece!
Final Thoughts – A Holiday Gift That’s Pure Magic! 🏰✨

Crafting these Harry Potter Pull-Top Christmas Gift Card Holders was an absolute spellbinding delight! Whether you’re a Gryffindor, Slytherin, Ravenclaw, or Hufflepuff, these gift card holders add a touch of Hogwarts magic to the holidays!
🎁 Perfect for:
✔ Harry Potter fans of all ages
✔ Holiday stocking stuffers with a personal twist
✔ A magical alternative to boring gift card envelopes
I can’t wait to see how you make these your own! Whether you go for house colors, wizarding world embellishments, or even a mix of different Hogwarts-inspired themes, the creative possibilities are endless!
So tell me… which Hogwarts house would YOU craft first? Let me know in the comments—or better yet, share your magical creations in the Members’ Gallery!
🔮✨ Until next time—keep crafting, keep dreaming, and may your creativity be as boundless as the Room of Requirement!
April - This Chick Loves Paper
🛒 Grab Your Supplies & Start Crafting!
All photos are subject to copyright ThisChickLovesPaper.com
Images @ Stampin’ Up!©️,
Images @ CTMH©️,
Images @ Etsy Sellers (linked).
The content in this blog is the sole responsibility of April Raine - This Chick Loves Paper, as a Stampin’ Up!® Independent Demonstrator. The use of and content of classes, services, or products offered is not endorsed by Stampin’ Up!®
Bring a little Hogwarts magic to your holiday gifting with these Harry Potter-Inspired Pull-Top Christmas Gift Card Holders! Featuring iconic house colors, spellbinding embellishments, and an interactive pull-tab mechanism, these handmade stocking-shaped holders are a must-have for Potterheads! Learn how to craft your own with step-by-step instructions, pro tips, and creative inspiration—only on This Chick Loves Paper! 🎁✨⚡
Comments